
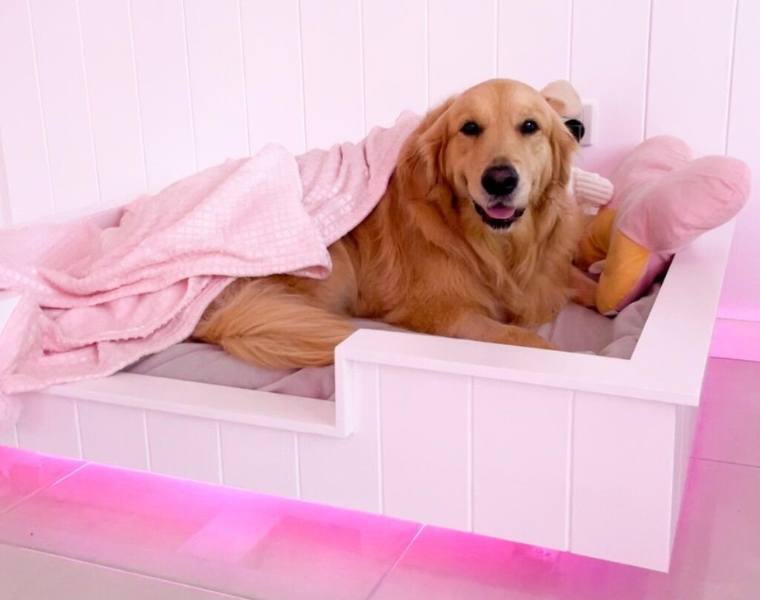
Australians absolutely adore their pets – in fact, with around 28.7 million pets we have one of the highest rates of pet ownership in the world! So it is no surprise that when it comes to dog beds, they do have to be the sad, old dog bed of days gone by. Don’t believe us? Here’s how @tarah.and.barry made a floating dog bed using easycraft panels.
With their durability, versatility, and aesthetic appeal, easycraft panels offer an excellent solution for crafting a pet bed that seamlessly blends into any Australian home. If you’re ready to follow suit, here’s what you’ll need to do in order to transform your favourite easycraft panels into a DIY pet bed.
Step-by-step pet bed assembly guide
1. Choose your easycraft panels
Explore the wide range of easycraft panels to choose the style that best suits your pet’s personality and complements your existing interior design choices. From classic to contemporary, there’s an easycraft panel and profile to suit. Once you’ve made your choice, you can visit your nearest Bunnings or other easycraft stockist to make your order.
2. Measure and cut the panels
Take precise measurements of your pet’s sleeping area and mark the dimensions on your panels. Carefully cut the panels according to those measurements, remembering to always wear appropriate safety gear.
3. Assemble the base
Joining the panels together to form the base of the pet bed will create a solid foundation. Use a suitable adhesive on the edges and securely attach them. Allow enough time for the panels to dry before moving on to Step 4.
4. Build the sides and back
Attach your pre-cut panels to the base, forming the sides and back of the pet bed. Use nails or screws to firmly secure the panels together. Make sure the corners are aligned neatly for a professional finish.
5. Finishing touches
Sand down any rough edges to create a smooth, polished finish. You might also want to add a few personal touches by painting the panels to match your existing space, or following @tarah.and.barry’s lead by installing some eye-catching underlighting.
Why Easycraft panels are a smart choice for DIY pet beds
Easycraft panels offer several advantages over traditional plaster boards., which makes them the perfect choice for DIYers. The panels are robust and hardwearing, which means they can stand up to constant pet activity.
Cleaning is made easier as well, which is helpful given that most pets love getting dirty and tracking their mess into your house. Simply wipe away any dirt or stains that have accumulated on the panels with a damp cloth and your pet’s sleeping area will be good as new.
Start building your DIY pet bed after a visit to Bunnings
Ready to embark on your DIY pet bed project? Head to your nearest Bunnings or other easycraft reseller or stockist to find a wide selection of panels. Our panels are made to order at Bunnings, so simply visit the Special Orders Desk and be sure to bring the relevant Bunnings code for your choice of easycraft panel.
Creating a stylish DIY pet bed for your furry friend is easier than you think thanks to easycraft. Why not make a weekend project out of it and give your pet a gift they will instantly fall in love with?
You can find more design inspiration by exploring our wide range of panels today. Stay informed about our latest releases by signing up to our mailing list here, or read our blog for inspiration and helpful guides.